 SALE! 10% OFF USE CODE: CRAFTED10

"Do you want your bedroom's storage space to be perpetually consumed by clutter and mess?"
Do you need help finding a solution that provides extra storage and looks stylish and modern?
If so, then you're not alone.
Many people face this same issue, and finding a solution can be frustrating.
Luckily, we have one for you - Storage Building Tips!
These tips will help you build your bed platform with storage, providing the perfect solution to your storage problems.
Not only will it give you more space to store your belongings, but it will also add a stylish and functional element to your bedroom.
So, let's dive into it.
Why Choose a DIY Platform Bed with Storage?
There are many reasons why choosing a DIY platform bed with storage is a fantastic option for your bedroom.
Firstly, it's a cost-effective solution. Opting to build a DIY platform bed frame instead of purchasing a pre-made one could save you significant money.
You can select materials that fit your budget, and by utilising tools such as a circular saw, wood glue, and a pocket hole jig, you can construct a sturdy and reliable bed at a fraction of the cost.
Secondly, a DIY platform bed offers unparalleled customization options. The design, size, and finish can all be tailored to your needs and preferences. Whether you want a simplistic platform bed or a more ornate DIY bed frame, the choice is yours.
Moreover, you can drill pocket holes where necessary, use pocket hole screws for secure fastening, and even use plywood sheets for added strength and durability. This level of customisation is hard to find when buying a pre-made bed.
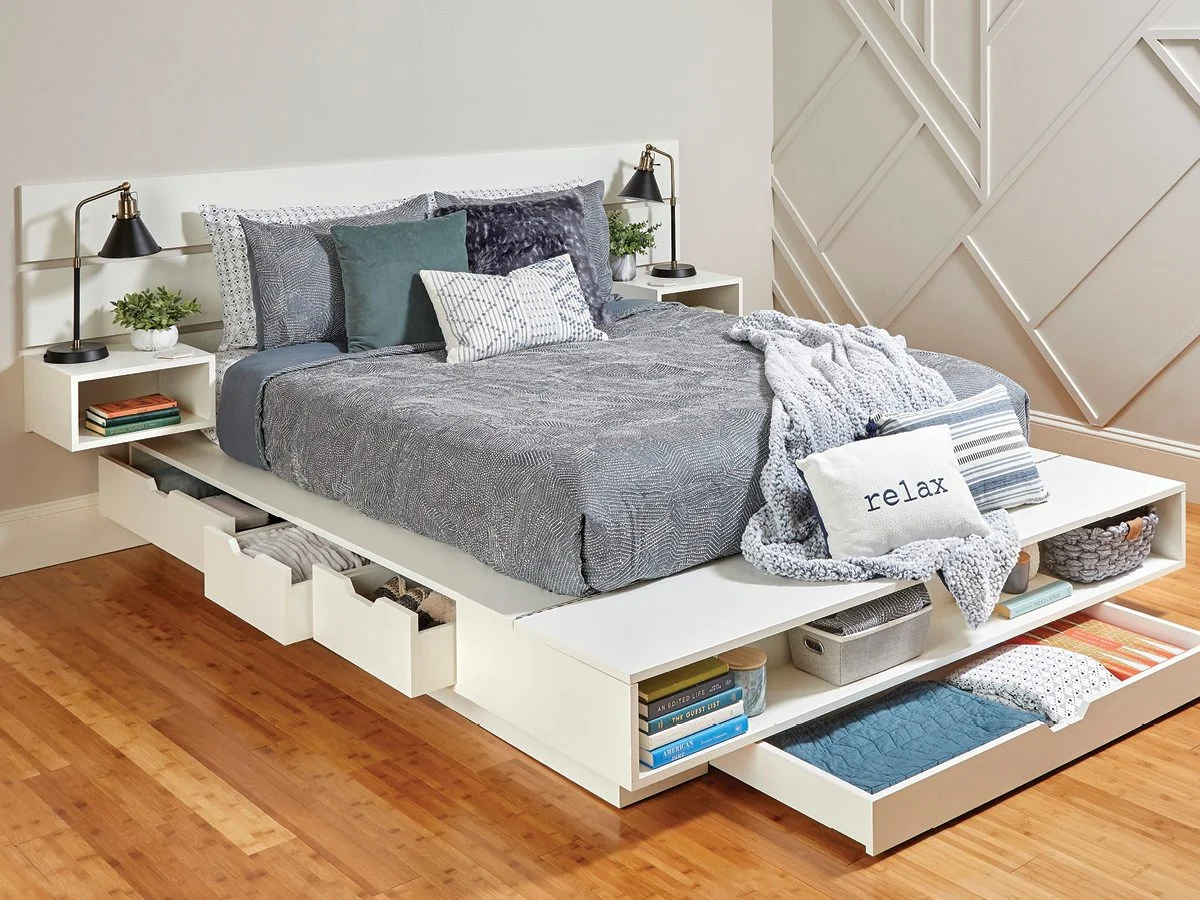
Furthermore, incorporating storage into the bed frees up floor space and keeps your room tidy and organised. It's an innovative way to utilise the often-neglected space beneath the bed.
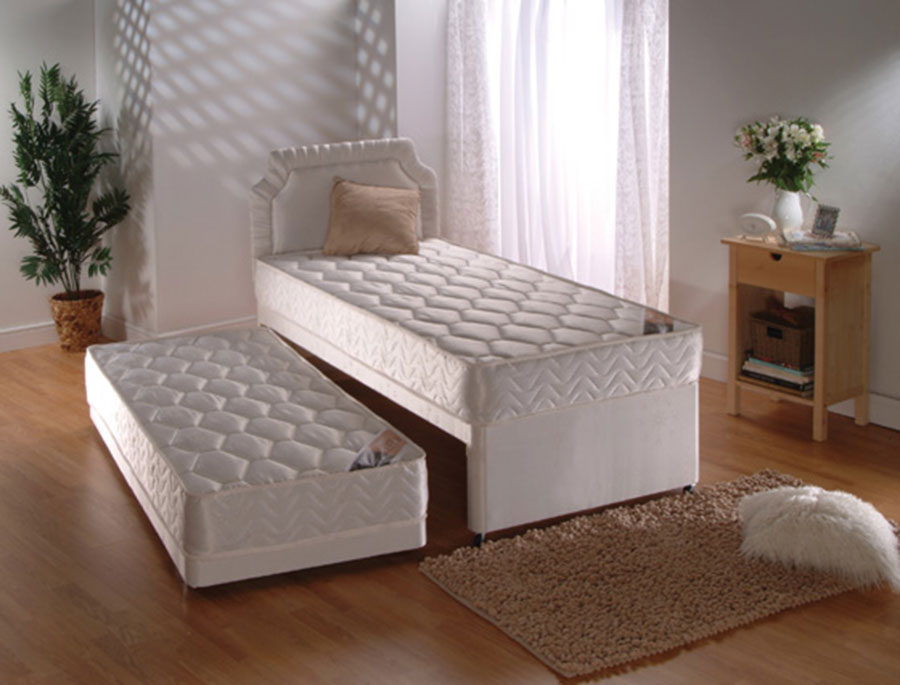
If you want a luxuriously comfortable bed and storage that hides your things, you should consider the Glitz Divan Storage bed. This functional and stylish piece of furniture is perfect for those living in small apartments with minimal storage.
Materials Needed for Building a Platform Bed with Storage
In this section, we'll talk about some materials and tools required in the building process.Building a platform bed with storage requires several materials to ensure the end product is sturdy, functional, and visually appealing.Materials are at the heart of any good DIY platform bed project.
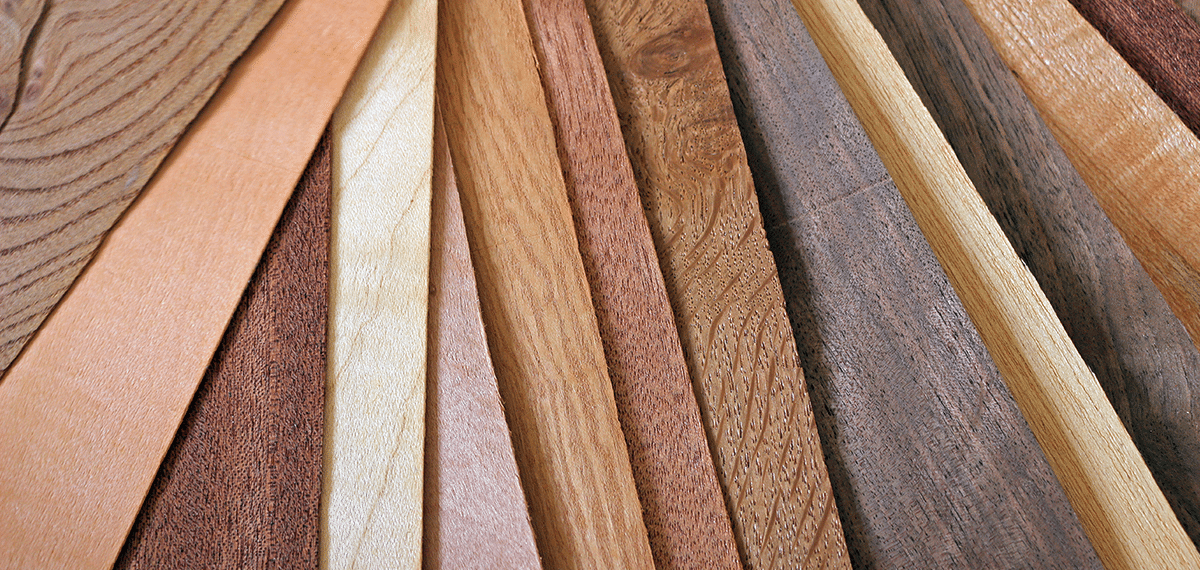
Firstly, you will need lumber, specifically 1x4s, for the bed frame. These boards form the structure of your platform bed frame and provide the necessary support.
Next on the list is plywood. Plywood sheets are versatile and robust, making them ideal for the platform bed's base and the storage compartments.If you want to add a touch of elegance to your storage bed, veneer is a great option.
This thin layer of high-quality wood can be adhered to the visible surfaces of your storage bed, giving it a polished, professional finish. In terms of tools, a few essentials will make the construction process smoother.
A circular saw is indispensable for cutting your materials to the correct size.A drill is required to make pocket holes for the screws that will hold your storage bed frame together. A pocket hole jig can simplify this process, ensuring accurate and consistent pocket holes.
Step-by-Step Guide to Building Your Platform Bed
Building your platform bed can be a rewarding and practical project. A platform bed is a simple and stylish alternative to a traditional bed frame, offering a sleek and modern look to your bedroom. By constructing your platform bed, you have the freedom to customise it to your desired size, style, and materials.
This step-by-step guide will provide all the necessary information for building your platform bed.
Step 1: Cutting the Materials
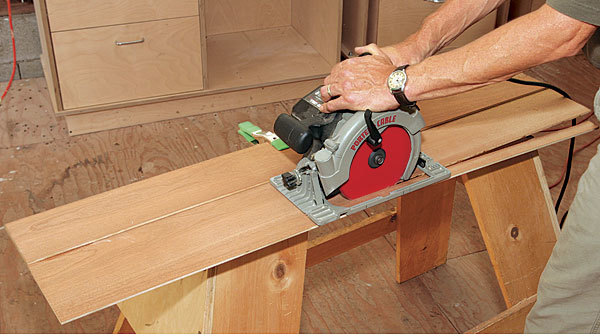
The Initial step of building your DIY platform bed begins with cutting your materials.
Firstly, measure and cut the 1x4s using a circular saw. These will form the side supports of your bed frame. Precision is crucial to ensure stability.
Secondly, cut your plywood sheet, which will serve as the base of your bed and the built-in storage compartments. Moreover, Ensuring straight and clean cuts is vital for properly fitting the storage underneath.
Following this, it's time to cut the veneer. This high-quality wood layer will adhere to your bed frame's visible surfaces for a polished finish. Handle it carefully to prevent damage.
Lastly, drill pilot holes in the 1x4s and plywood. These will guide your wood screws for a sturdy construction. A Kreg jig can be useful here, allowing you to create accurate pocket holes for your pocket screws.
Step 2: Building the Base Frame
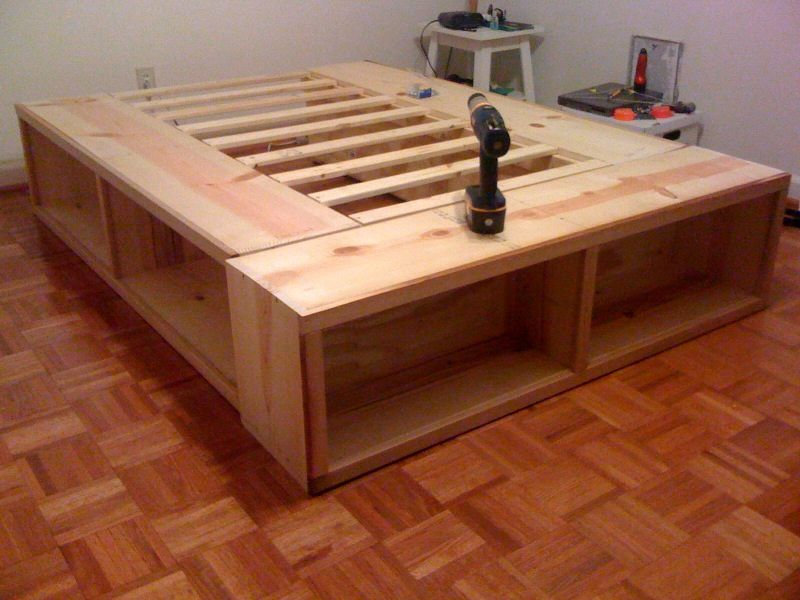
Moving on to step two of building your DIY platform bed, you'll now construct the base frame.
Begin by taking your cut pieces of 1x4s and aligning them according to your material list. This step is crucial to achieve optimal stability for your storage bed.The 1x4s should be positioned to create the outer frame, forming a secure foundation for the rest of the bed.
Next, it's time to attach these pieces. Using your drilled pocket holes, drive screws through one end into the other, securing the frame.A Kreg jig can be particularly useful during this process, allowing you to create accurate pocket holes for your screws.
Step 3: Constructing the Bed Frame
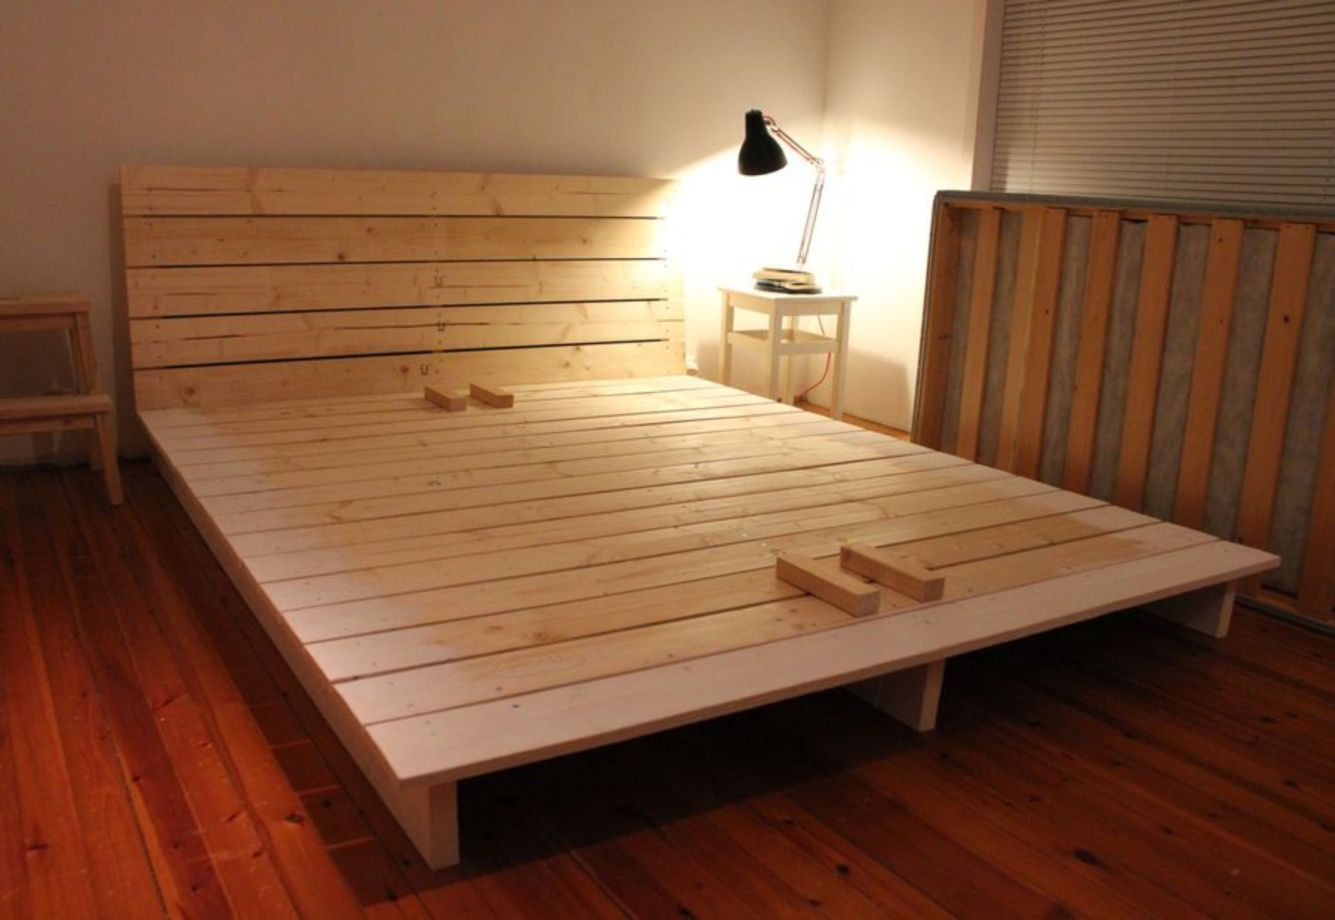
Step three involves constructing the actual bed frame. Start by attaching the side supports (cut from 1x4s) to the inner sides of the bed frame. These supports provide extra strength and stability to the bed structure.
Use wood screws to attach these pieces securely, ensuring they're flush with the bottom edge of the frame. It's important to ensure all pieces are securely attached. Any loose parts could compromise the stability of your bed, so double-check all screws are tight.
Once your bed frame is assembled, you can move on to the next steps of the project, which include Building and Installing Drawers.
Upgrade your bedroom with our Diamond Divan Storage Bed, designed for comfort and convenience.
Step 4: Building and Installing Drawers
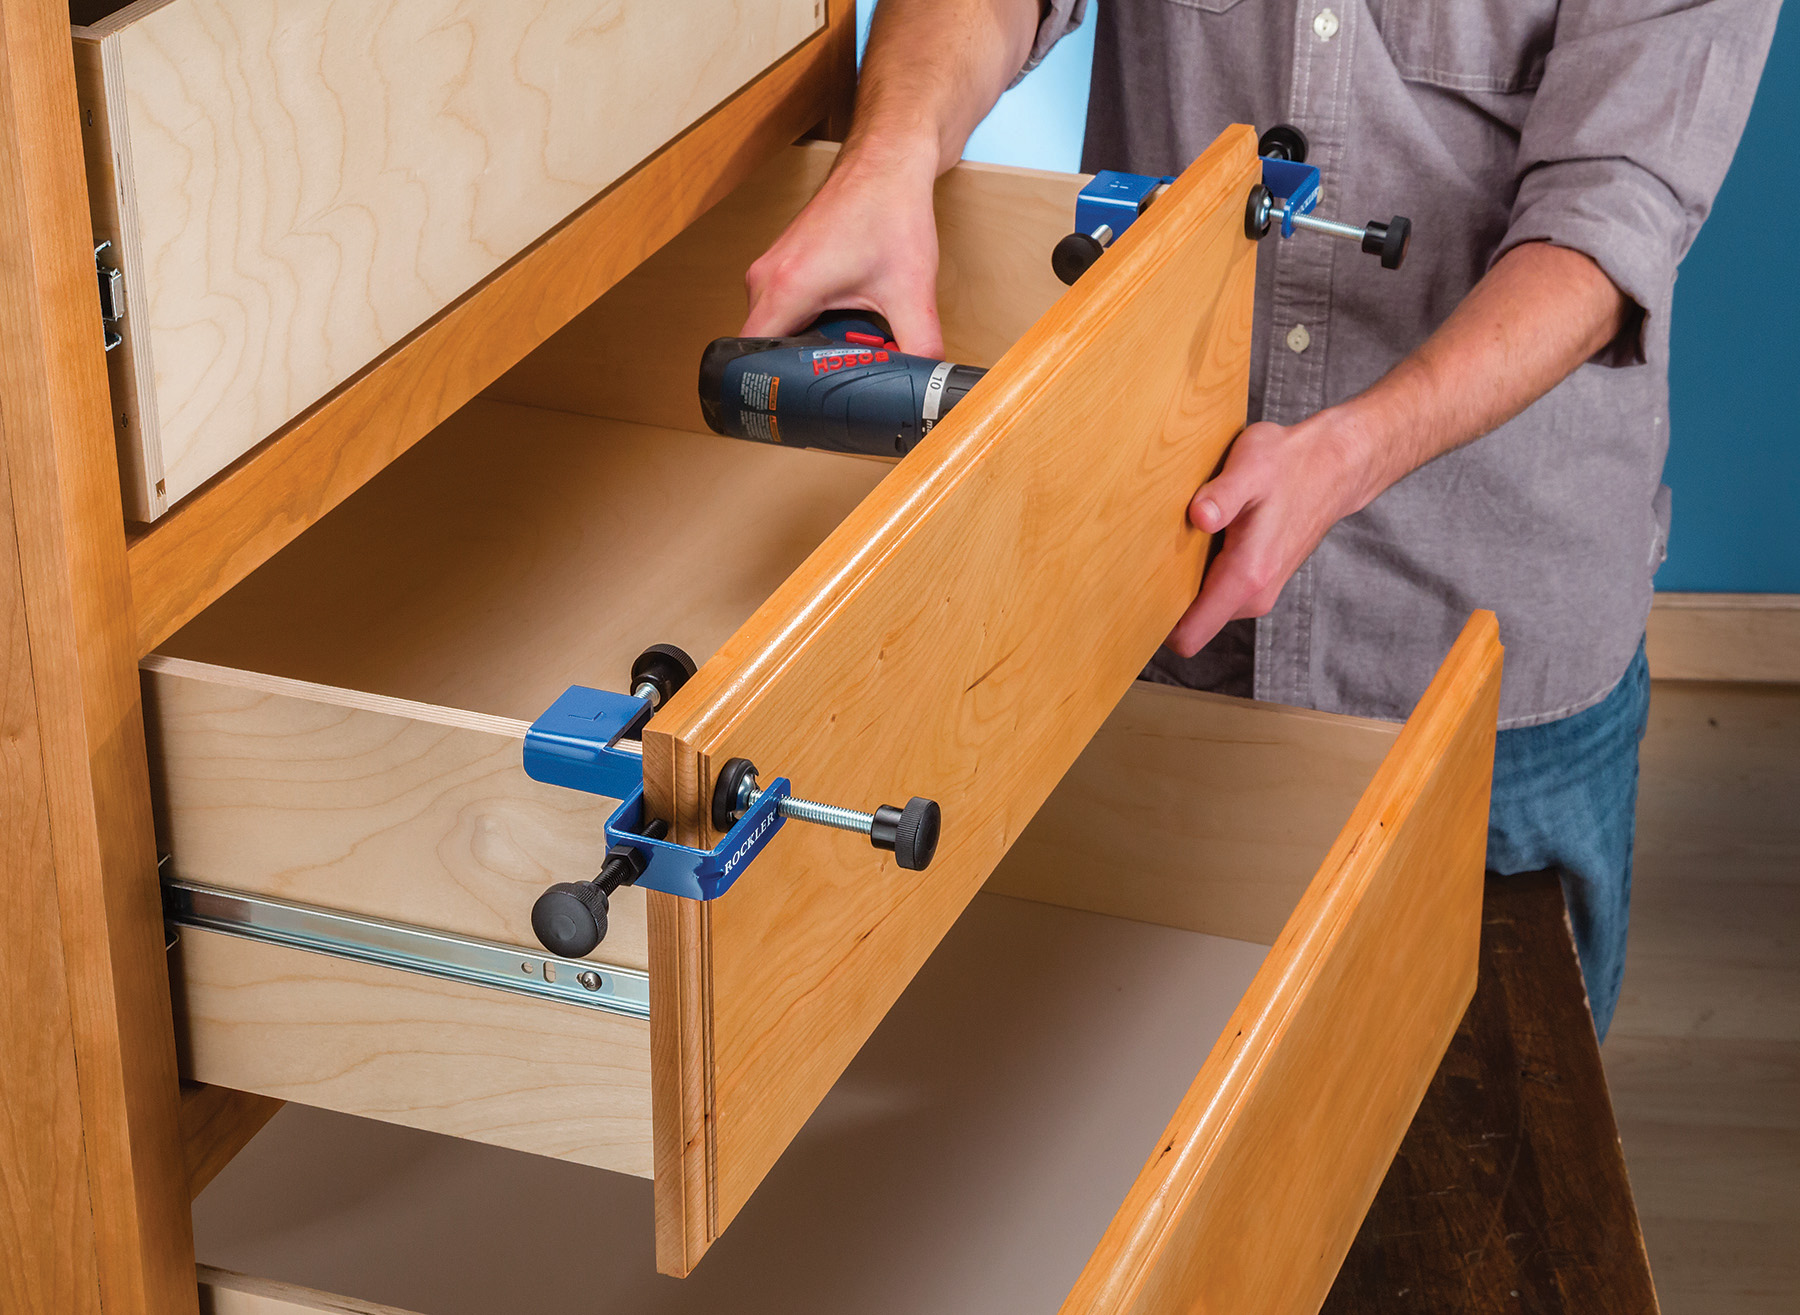
Step four in your DIY platform bed project involves building and installing drawers for storage.
Creating drawers begins with determining the dimensions needed for your bed frame. Once you have these measurements, cut two 1x4s for the drawer sides, ensuring they align perfectly with the storage section of your platform bed.
Next, assemble the drawer boxes. Attach the drawer fronts to the sides using screws. Make sure all edges are flush, and everything is square. It will ensure your drawers slide in and out smoothly. Attach the bottom edge of the drawer box to the sides, creating a sturdy base.
Now, onto installing the drawer slides for easy access. Attach the slides to the drawer supports, holding them flush with the bottom and the end. It's important to secure the cabinet-mounted slide to the inside of the bed frame using screws. This will allow the drawer to slide in and out easily, providing easy storage access.
Ensure that the slides are correctly aligned. The front of the slide should be parallel with the front edge of the side panel. Once the slides are installed, you can install the drawer box into the slides. This step should be repeated for all drawers in your bed frame.
With your drawers installed, your DIY platform bed is coming together nicely. This project provides a comfortable place to sleep and practical storage solutions, making it an excellent choice for small apartments or rooms.
For a detailed guide on how to build and install drawers for your DIY platform bed, visit AutoDesk Instructables.
Step 5: Adhering the Veneer and Smoothing Surfaces
Step five of your DIY platform bed journey involves adhering veneer to the plywood and smoothing the surfaces.This step is essential to give your bed frame a polished, professional look.
To start, make sure the plywood surface of your bed is clean and smooth. You may need to sand it sightly to get rid of any rough edges or imperfections that are present.
Once you've got a smooth base, it's time to apply the veneer. A veneer is a thin layer of high-quality wood that adds elegance to your DIY platform bed frame.
Applying the veneer requires careful attention to detail. Ensure the veneer is face down on a clean surface before you begin. Using a suitable adhesive, apply a thin layer onto the plywood surface of the bed frame. Then, carefully position the veneer onto the glued surface.
Apply pressure evenly across the veneer to ensure it sticks properly to the plywood. This process must be repeated for each piece of plywood in your bed frame. Once the veneer is securely attached, it's time to smooth the surfaces.
Using fine-grit sandpaper, gently rub over the veneer in the direction of the grain. This will help to create a smooth, polished finish. "Remember, this step requires patience and gentle handling to avoid damaging the veneer."
Completing this step brings you closer to finishing your king-size DIY platform bed.
Step 6: Positioning the Dividers and Final Touches
In the sixth and final step of your DIY platform bed journey, it's time to position the dividers and add those all-important final touches. The dividers are a crucial part of your storage bed, creating individual compartments for easy organisation.
Starting with the dividers, measure the inside of your bed frame to determine where you'd like your storage compartments to be. This step may vary depending on whether you're building a queen-size or smaller bed, as the available space will differ.
Once you've determined the placement, mark these points on the frame of your bed. Next, drill pilot holes into the marked points. These pilot holes will guide your screws and prevent the wood from splitting when you attach the dividers.
Cut your particle board into sections that fit your desired compartment sizes, then secure them to the bed frame using screws.Ensure each divider is attached securely and stands upright. Now, you are up for the final touches of your storage DIY platform bed.
Start by filling any screw holes with wood filler, allowing it to dry before sanding it down for a smooth finish.This process will hide any visible screws, giving your platform bed with storage a more polished look.
Finally, choose a paint or varnish to apply to your bed. This will enhance the look of your bed and protect the wood.Apply the first coat and allow it to dry before adding additional coats. The building process of your platform bed is completed now.
Discover our beautiful Divan Ottoman BaseSide Lift Storage bed that combines the elegance and style of a traditional Divan bed with the convenience of a hidden storage solution.Creative Ideas for Customising Your Platform Bed
Now, let's discuss some Creative Ideas for customising your platform bed.
When customising your platform bed, the possibilities are limited only by your imagination.Using IKEA storage cabinets and dressers as lofted beds is a highly creative and practical idea.
Moreover, The approach not only maximises the use of vertical space but also provides ample storage options, making it a perfect fit for a small room.
Also, Ensure the units provide enough storage for your needs and align with the decor of your room. Once you've selected the right units, arrange them in an L-shape or depending on your room's layout.
Choosing the Right Bed is crucial here, as the size and height of the bed will determine the type of storage units you'll need. Next, cut wood to size based on your bed dimensions and lay this across the top of the storage units, creating a lofted platform bed with storage below.
Now, drill pocket holes into the wood and secure it to the storage units using screws, providing extra support. Furthermore, you could also incorporate a bookshelf at the headboard for avid readers or build pull-out drawers on the sides for additional storage.
Consider adding a slide on one side for a fun and playful touch for kids' rooms. Whatever your design preference, remember that the aim of this project is not just to create a comfortable place to sleep but also to maximise your room's functionality.
So keep your cut list handy, follow your simple design, and soon, you'll have a customised platform bed that perfectly suits your needs!
FAQs
How to Build an Easy Bed Platform?
Building an easy bed platform involves a few simple steps:
-
Measure your mattress to determine the size of your platform.
-
Cut your wood to size and drill pocket holes into the pieces. Assemble the frame using screws, making sure it's sturdy.
-
Add a sheet of plywood on top for the mattress to rest on.
How do you make a bed frame with storage?
To make a storage bed frame:
-
Start by building a standard platform bed frame.
-
Construct drawers or compartments using additional wood pieces, ensuring they fit within the frame.
-
Attach the drawers or compartments using drawer slides or hinges.
-
Finish by adding handles for easy access.
How Do You Make a Regular Bed Into a Platform?
Converting a regular bed into a platform involves removing the box spring and adding slats or a solid base. Measure the inside of the bed frame and cut wooden slats or a piece of plywood to size. Place these within the frame to create a solid base for your mattress.
What Do You Put Under a Platform Bed to Hold It Up?
You can use various supports to hold up a platform bed. Bed risers are a common choice, available in different heights and materials. Alternatively, you could use cinder blocks or even sturdy wooden crates. Ensure your chosen supports are evenly distributed and securely placed to maintain stability.
Final Words
That is all you have about storage bed frames. Now, you might be wondering where to purchase these beautiful and functional pieces of furniture.
So, whether you are looking for extra storage space or a stylish upgrade to your bedroom, consider purchasing Crafted Beds.
With our wide range of storage bed frames, we are confident you will find the perfect one to suit your needs and taste.
Out of all our storage bed frames, we highly recommend the Rion Divan Storage Bed and Cube Divan Storage Bed. The Rion Divan is a classic design with built-in drawers for convenient storage, while the Up Lift Bed features a hydraulic lift system that allows easy access to under-bed storage. Both are beautifully crafted and durable, making them the perfect investment for your bedroom.
The Good news here...
Our wide range of hand-crafted, supremely comfortable and luxurious bed frames will surely add elegance and practicality to your bedroom.
So, why wait?
Take Action now and transform your room into a clutter-free, stylish haven with Crafted Beds' storage bed frames.


